How To Screenshot A Specific Area On Windows 10
How to screenshot a specific area on Windows 10? A screenshot is a picture taken of what’s on your screen. It is known that the Print Screen button allows you to take a screenshot of the entire screen; However, what about the screenshot-specific area on the PC?
There are even built-in utilities and third-party tools that can capture custom regions and send the screenshot to the clipboard or save it as an image. This guide identifies the three easiest methods and shares their steps.
How To Screenshot A Specific Area On Windows 10 With Hotkey
In addition to the single Print Screen button, PCs allow you to use several keyboard shortcuts to take screenshots if you need to. To scan a specific area, such as a window, the Alt + Print Screen keys are available.
- Step 1: Put what you want to make for a screenshot on your desktop, e.g. a program window or a video display.
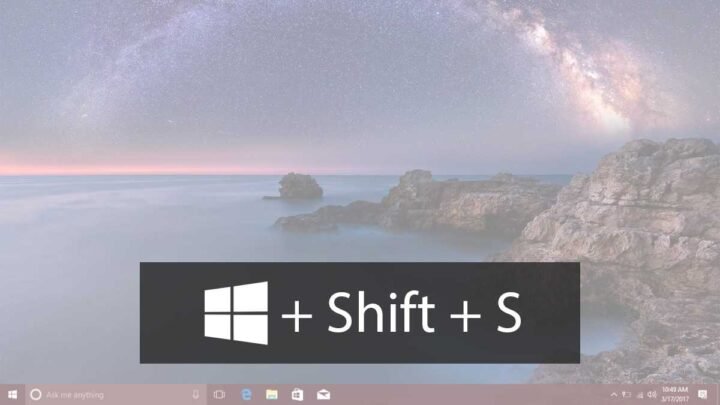
- Step 2: Press the Alt + Print Screen keys at the same time if you want to take an active window as a screenshot. To capture part of the screen, press Win + Shift + S simultaneously.
- Step 3: In the Start menu, look for MS Paint in the lower-left corner of your desktop. Then open it and click the Insert menu on the top ribbon to paste the screenshot. Then you can crop the screenshot as you want in Windows.
- Step 4: Edit it as a normal image. Then go to the File menu, select Save As, and choose a suitable format. In the pop-up window, navigate to a location, enter a file name, and click the Save button.
How To Screenshot A Specific Area On Windows 10 Using Snipping Tool
The Snipping Tool is a built-in utility for taking screenshots of specific areas on the PC. Moreover, you can redesign the screenshot using the simple image editing tool.
- Step 1: Go to your Start menu in the lower-left corner, search for Snipping Tool, and open it.
- Step 2: Click the Mode menu in the top menu bar and select a suitable mode. To take a screenshot of a specific area on a PC, you can choose Rectangular Cut, Windows Cut, or Freeform Cut.
Tip: To change the destination folder and more, click the Options menu.
- Step 3: Then click on the New menu and your screen will turn gray. When selecting a panel, click on the window. Or use your cursor to cover the desired area.
- Step 4: Release your mouse and the screenshot will be pasted into the edit box. Then edit it and click the save icon to save the screenshot to your hard drive. You can also press the clipboard icon to send it to your clipboard.
Method 3: Using Print Screen with Paint
This method is a bit more manual but works perfectly if you prefer using Paint for additional edits.
Steps:
- Capture the Entire Screen: Press
Print Screen (PrtScn)on your keyboard. - Open Paint: Type “Paint” in the search bar and open it.
- Paste the Screenshot: Press
Ctrl + Vto paste the captured screen. - Select the Area: Use the “Select” tool to highlight the area you want, then click “Crop.”
- Save Your Screenshot: Save the edited screenshot.
Method 4: Using Third-Party Tools
For those who need more advanced features, third-party tools like Greenshot or Lightshot offer additional options and flexibility.
Greenshot Steps:
- Install Greenshot: Download and install Greenshot from its official website.
- Capture Area: Press
Print Screenand select the area you want to capture. - Edit and Save: Use Greenshot’s built-in editor to annotate and save your screenshot.
Frequently Asked Questions About How To Screenshot A Specific Area On Windows
How do I take a screenshot of a specific area on the iPad?
When you see the screen you want to record, press, and hold the Home and Power buttons at the same time until your screen flashes. On the iPad Pro 2020, replace the Home button with volume up. Then go to the Photos app, find the screenshot, and crop any unwanted parts. Otherwise, you can use a third-party screenshot app to get them.
Where is the Print Screen button?
The Print Screen button is usually located on the top line of your keyboard, next to the function keys. Sometimes it is abbreviated as Prscr, PRTSC, PrtScrn, Ps, etc.
Where are print screens stored?
By default, screenshots are saved to your clipboard when you use the Print Screen button. Then you can go to a suitable program like Office Word and paste the screenshot directly. The location folder differs depending on how you use it. In most cases, the default location is C:\UsersYour Name images on PC.
Which tool is best for capturing specific areas on Windows 10?
Snip & Sketch is highly recommended due to its ease of use and integration with Windows 10. However, the Snipping Tool and third-party options like Greenshot are also excellent choices.
How do I screenshot a specific area on Windows 10?
To screenshot a specific area on Windows 10, you can use tools like Snip & Sketch, the Snipping Tool, or third-party applications. Simply select the desired area and save your screenshot.
Can I edit my screenshot after capturing it?
Yes, both Snip & Sketch and the Snipping Tool offer basic editing features. For more advanced edits, you can use tools like Paint or third-party applications.
What if I want to capture a specific area regularly?
If you need to capture specific areas frequently, consider using a third-party tool like Greenshot, which offers customizable hotkeys and advanced features.
How do I save my screenshots?
After capturing, you can save your screenshots directly from the tool you’re using. Snip & Sketch, the Snipping Tool, and Paint all have save options. Ensure you choose the desired file format (e.g., PNG, JPEG).
Conclusion – How To Screenshot A Specific Area On Windows
This guide discussed how to screenshot a specific area on Windows. It’s a handy screen for taking pictures of everything on your desktop. The shortcut is the easiest way to go, although you can’t edit the screenshots directly. If you prefer the snipping tool, it can meet your needs as well. More importantly, it offers professional-level features that anyone can quickly master. If you have any other questions about how to screenshot an item ona PC, please leave a comment below.
Capturing a specific area on your screen doesn’t have to be complicated. With tools like Snip & Sketch, the Snipping Tool, and even Paint, you can easily grab exactly what you need. Remember to choose the method that best fits your workflow. Whether you’re troubleshooting, preparing presentations, or just saving snippets of information, these techniques will make your life much easier.
So, next time you need to capture a specific part of your screen, give these methods a try. You’ll be amazed at how efficient and straightforward it can be. For more tech tips and tutorials, keep visiting 9jaboizgist.com.ng!
Ready to become a screenshot pro? Start practicing these methods today and streamline your digital tasks!


